Every patio is one slab and a series of choices
A concrete patio is one pour, and what makes it look custom is four decisions layered on top: the finish texture, the color, the border or banding, and where the joints fall. Pick those deliberately and a plain rectangle in Clovis reads as designed. Leave them to chance and you get grey flatwork with random saw cuts, which is what most valley backyards already have. The good news is that none of those four decisions costs very much on its own.
Almost everything in this article is about how the concrete surface is worked and colored, not about a coating applied over the top. So when we talk about a finish, we are talking about what the crew does to the surface of the concrete on the day it goes down.
A concrete patio is one pour, and what makes it look custom is four decisions layered on top: the finish texture, the color, the border or banding, and where the joints fall. Pick those deliberately and a plain rectangle in Clovis reads as designed. Leave them to chance and you get grey flatwork with random saw cuts, which is what most valley backyards already have. The good news is that none of those four decisions costs very much on its own.
Broom finish, the one that earns its place
Broom finish is the default for good reasons. The surface is floated smooth then drawn with a broom to leave a fine, even texture that grips underfoot, sheds water, hides dirt and costs less than anything decorative. On a hot Fresno afternoon a light broom finish is one of the more comfortable surfaces you can stand on barefoot, and it is genuinely slip resistant when wet, which is why it is the standard around pools and on side yard walkways.
It is also more versatile than people assume. Broom direction can run with the long axis of the patio or be varied panel by panel for a subtle checkerboard effect. A smooth troweled border around a broomed field gives a clean edge that looks deliberate. Combine that with an integral color and you have something that costs barely more than plain grey and looks nothing like it. It is the finish we pour most often, and for most valley backyards it is simply the right answer.
If budget is the main constraint, spend it on size and base prep and take a light colored broom finish. You will use the extra four feet of patio every week. A bigger patio in a plain finish serves you better than a small one with an expensive pattern, and it can always be dressed up later with a stain, a border or a cover overhead. Size is the one decision that cannot be undone cheaply.
- Best value per square foot of any finish
- Slip resistant wet or dry, which matters near pools and steps
- Broom direction can vary panel to panel for a subtle pattern
- Smooth troweled borders sharpen the edges
- Takes integral color well for very little extra cost
Stamped concrete, pattern and scale
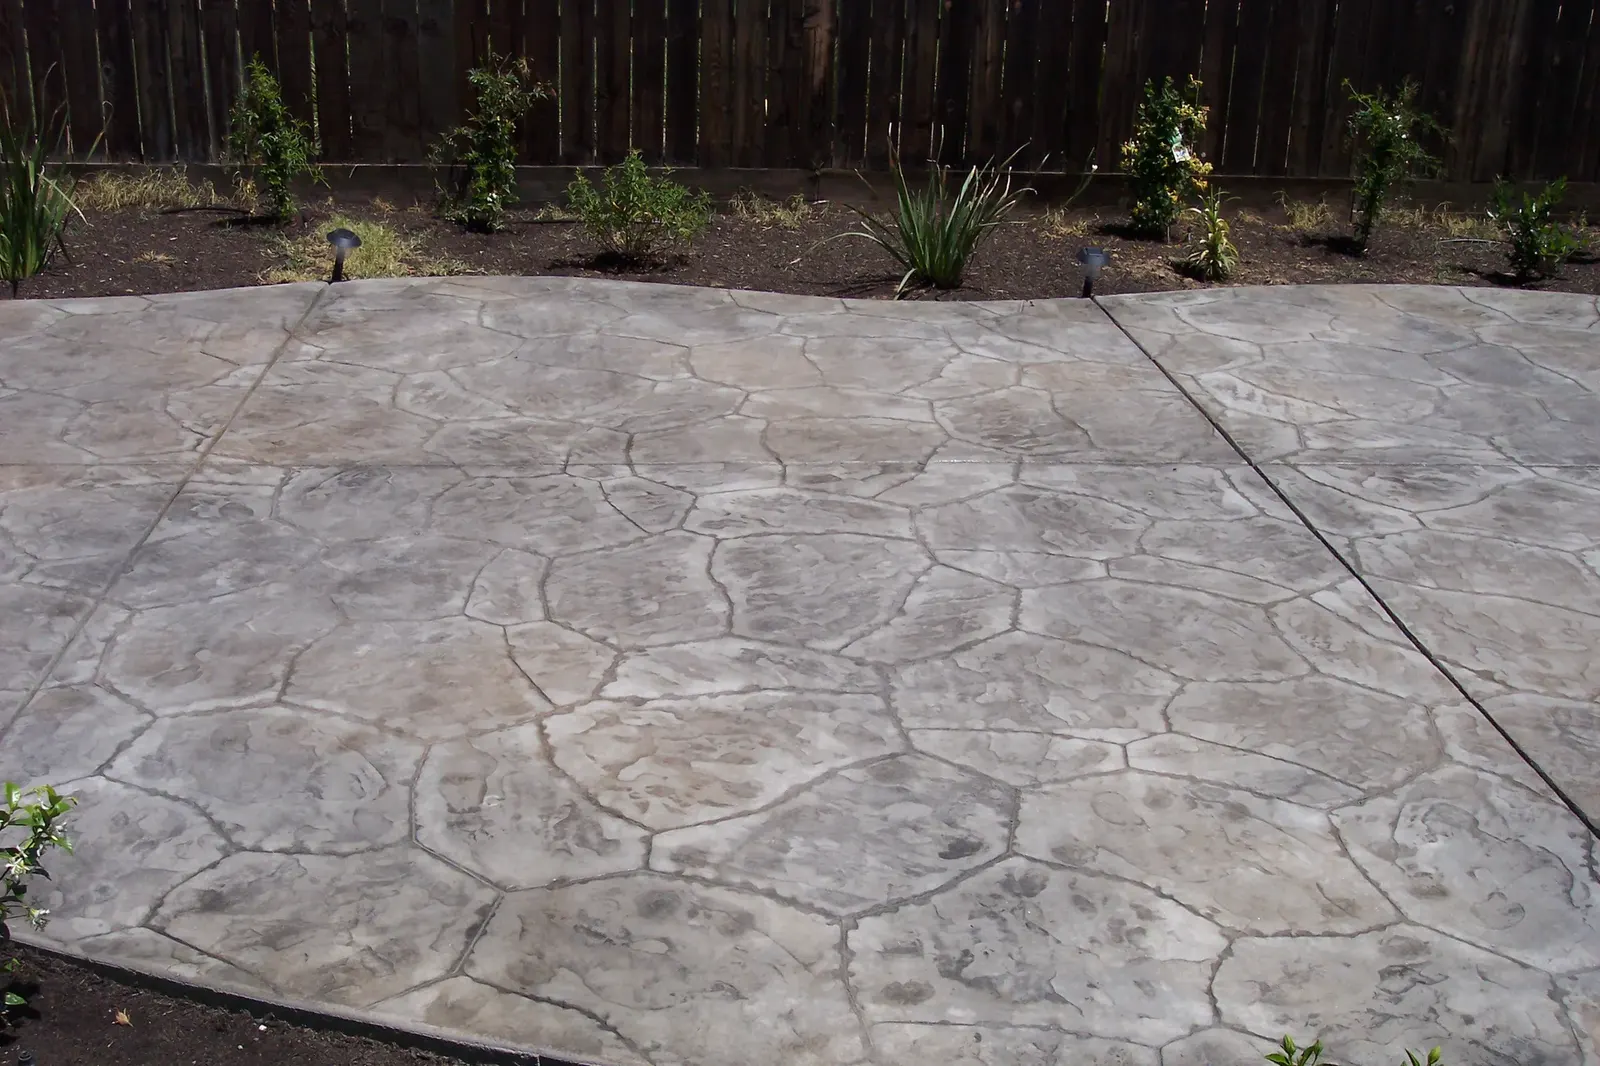
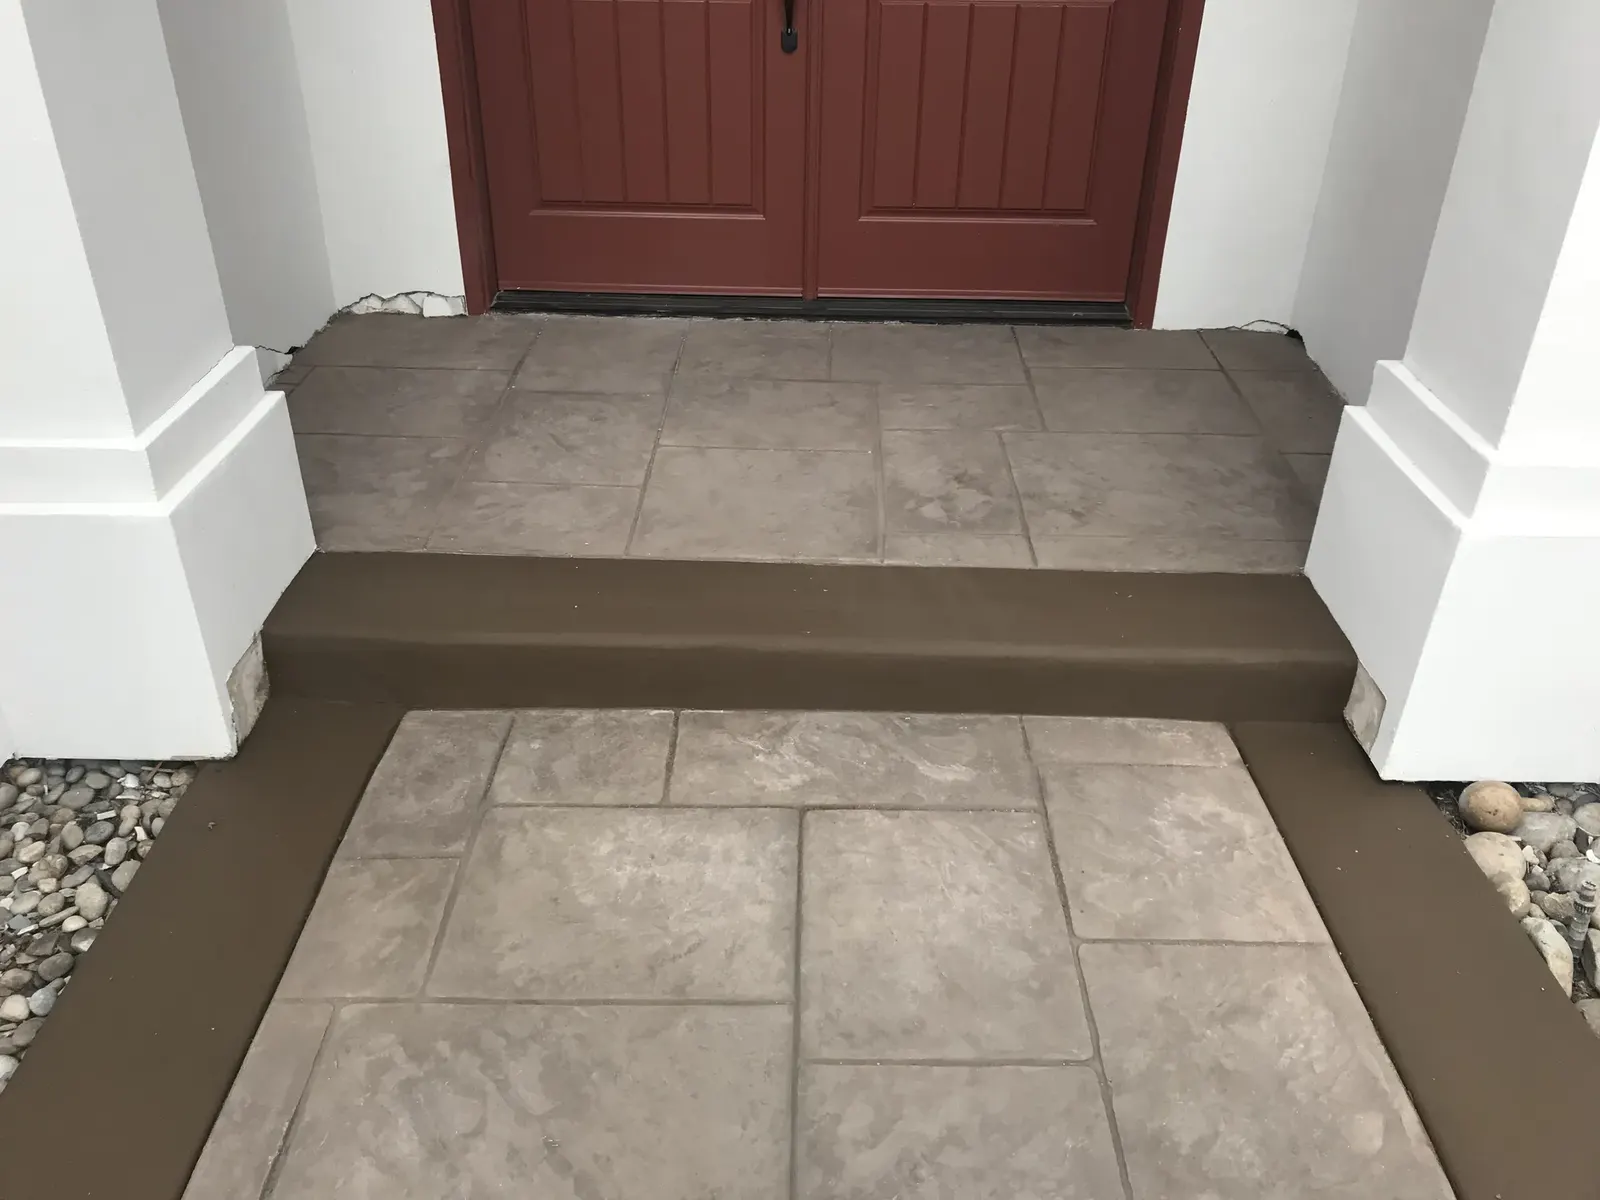
Stamping presses a pattern into the surface while the concrete is still plastic, so you get the look of stone, slate, brick, cobble or wood plank in one continuous slab with no joints for weeds to find. Ashlar slate and random stone patterns suit most valley homes. Running bond brick suits older Fresno neighborhoods and Tower District style houses. Wood plank stamping is the current favorite for covered patios and California rooms, where the grain pattern reads beautifully under a roof.
Scale is the decision people underthink. A large format stone pattern on a small patio looks cramped, and a small cobble pattern across a big open slab reads as busy from a distance. We lay pattern out to the actual dimensions of your slab, and where the field is large we break it with a border or a band rather than running the same stamp to every edge. Seeing the stamp mat laid out on the formed slab before the pour makes that decision obvious in about ten seconds.
The honest tradeoffs: stamped concrete costs more than broom, it needs sealing to keep its color, a sealed surface can be slicker when wet, and a darker stamped color gets hot in full afternoon sun. Under a cover, or in a lighter tone, none of that is a problem. We will tell you honestly where stamping is going to look spectacular in your yard and where a simpler finish will serve you better, which is not a conversation every contractor volunteers.
- Ashlar slate and random stone: the most broadly flattering patterns
- Running bond brick for older neighborhoods and traditional homes
- Wood plank under covers and in California rooms
- Scale the pattern to the slab, and border a large field
- Plan on sealing, and choose lighter tones for barefoot areas
Exposed aggregate, the valley classic
Exposed aggregate washes the top layer of paste off while the concrete is still green, revealing the natural stone in the mix. It gives you texture, real slip resistance, and a surface that hides leaves, dust and pool splash better than anything else. It has been the Central Valley pool deck and patio finish for fifty years, and it is the finish we are most often asked to match on decks that were poured in the 1970s.
The look changes completely with the aggregate. A standard local mix reads grey and speckled. A seeded aggregate, where decorative stone is broadcast onto the surface before washing, gives you control over color and size, from warm river rock browns to darker basalt tones. Sand finish or light exposure keeps the texture gentle for bare feet, while a heavier exposure gives more grip and more visual depth. Samples matter more here than on any other finish, because the stone is the look.
One homeowner had us redo a 47 year old exposed aggregate pool deck, working from consultation through design with Ruben and out to the finished deck with The owner and the crew. That finish lasted almost five decades in valley sun, which tells you most of what you need to know about it. That job ran from the first consultation through to the finished deck with the same people involved at both ends, which is how we prefer to work.
Want your yard priced?
Free estimate, we walk it with you.
Color, and what heat does to your choice
There are four ways to color concrete and they behave differently. Integral color is mixed into the concrete at the plant, so the color runs through the whole slab and a chip does not show grey underneath. Color hardener is broadcast onto the surface and worked in, giving stronger, denser color and a harder wearing top surface, and it is the standard partner to stamping. Release colors are applied during stamping and create the secondary tone in the pattern recesses that makes stone look real. Acid and water based stains are applied to cured concrete and give a variegated, translucent result.
In this climate, the tone is not only an aesthetic call. A dark charcoal or deep brown slab in full afternoon sun in Madera or Visalia will be unpleasant on bare feet in July, while a tan, buff or light grey slab stays manageable. So the practical rule we use is simple: darker colors under a cover, in shaded areas, or where people wear shoes. Lighter colors on open patios and around pools.
Look at any color sample outdoors, on a large piece, in afternoon light. Color chips lie, and concrete cures lighter than it looks wet. Ask for a sample poured with the same mix and the same finish you are buying, then look at it dry, in full sun, at the hour you will actually be using the patio. It is the cheapest insurance in the whole project and it costs one afternoon.
- Integral color: through the slab, forgiving of chips and wear
- Color hardener: strongest color and a denser surface, ideal with stamping
- Release color: the secondary tone that makes a stamped pattern read as stone
- Stains: variegated and translucent, applied after the slab has cured
- Lighter tones on open patios, darker tones under shade
Borders, banding and saw cut patterns
This is where the biggest visual return sits for the smallest money. A plain broomed field with a smooth troweled border, or a contrasting colored band around the perimeter, immediately looks designed. Saw cut score lines in a diamond, grid or offset pattern turn a large slab into panels that read as a floor rather than a driveway. A stamped or paver band breaking a long patio into two zones does the same job and marks the transition between dining and lounge.
Borders also solve real problems. They give a clean visual line where the patio meets turf or a planting bed, they let us mask the transition where a new pour ties into an older slab, and they provide a logical place to run a joint that needed to exist anyway. That last part is worth emphasizing: the best decorative joint layouts are the ones where the design lines and the control joints are the same lines.
Bands of a second material work beautifully too. Paver borders and cantilever coping around a concrete field are a favorite in newer Clovis and Friant backyards. A band of pavers set into a concrete field gives you two materials and two textures on one surface, and it is a clean way to break up a large slab. Cantilever coping does the same job where the patio runs up to a pool or a spa.
- Smooth troweled or contrasting border around a broomed field
- Saw cut diamonds, grids or offset panels on large slabs
- A stamped or paver band marking the change between zones
- Borders to mask where new concrete meets an older slab
- Design lines and control joints made to be the same lines
Matching an extension to an existing patio
Extending an existing slab is one of our most requested jobs, usually because the original builder patio is too small for the table people actually own. It is very doable and there is one thing to be honest about up front: an exact color match to concrete that has weathered in valley sun for fifteen years is not achievable. New concrete cures lighter and brighter, and it will remain distinguishable for a good while even when the mix and finish are identical.
So the design solves it rather than pretending. We either run a deliberate border or band at the seam, so the transition reads as a design decision, or we change the finish on the new area on purpose, such as a broomed extension off a troweled original. Both look intentional. A seam that was trying to disappear and did not is the only bad outcome. Either way you get a line that looks like somebody chose it, which is what you want to be looking at in five years.
Structurally, we tie in properly, put a real joint at the interface so the two slabs can move independently, and carry the slope through so water still leaves the house. That joint does real work. Two slabs poured fifteen years apart move at different rates, so they need to do it independently instead of dragging a crack across the new concrete. We put it where the border already is, so it disappears into the design.
Joints, slope and the things you will not see
The finishes get all the attention and the invisible work decides whether you still like the patio in ten years. Base prep and compaction come first, because most valley yards sit over a hardpan layer that behaves nothing like a compacted aggregate base. Reinforcement goes in at the right height inside the slab. Control joints get cut early and spaced to the slab thickness, so the concrete cracks where we chose rather than across your stamped pattern.
Then drainage. Slope is set before the pour so water runs away from the house, joints are placed to work with the fall, and area drains go where the grade needs them with a discharge point that actually works. We check the finished surface for standing water before we call it done, and we come back if water sits.
- Compacted aggregate base sized to the load, over prepared subgrade
- Steel supported inside the slab, never laid on the dirt
- Control joints cut early and spaced correctly for the thickness
- Slope set before the pour, checked after it
- Area drains with a real discharge point
Questions we get about this
The follow ups this subject raises once somebody starts pricing it for real.
Which concrete patio finish looks best for the money?
A light integral colored broom finish with a smooth troweled border and a saw cut panel pattern. It costs only a little more than plain grey, stays cool and slip resistant in a valley summer, and looks deliberately designed rather than like builder flatwork. Spend what is left on making the patio bigger, because size is the thing homeowners wish they had bought more of.
Does stamped concrete need to be sealed?
Yes, if you want the color to stay rich and the surface protected. Sealer deepens the color, guards against staining and helps the pattern hold up, and it needs reapplying periodically depending on sun exposure and traffic. Remember that sealed surfaces can be slicker when wet, so around a pool we will usually specify a sealer with a slip resistant additive or recommend a textured finish instead.
Can you match the exposed aggregate on my older deck?
We can get close, and we do this often on valley decks poured decades ago. Matching means selecting an aggregate and an exposure level that reads the same from standing height, rather than producing an identical slab, since the original has weathered for years. Where a perfect match is not realistic, a border or a change of finish at the seam gives a result that looks planned instead of patched.
Salas Outdoor
Written by the crew that does the work. Family owned since 1980, backyard remodeling and concrete across Fresno, Clovis and the Central Valley.